Showing posts with label Dinner. Show all posts

Sunday, October 21, 2012

Crock Pot Italian Beef


If you're not from Chicagoland, you probably don't have easy access to good Italian Beef sandwiches.  In Chicago and the suburbs, I would bet you're never further than a 5 minute drive from a good Italian Beef.  Out here in Ohio, sadly, things are not the same.  All is not lost, however - it's easy to make a good beef sandwich in the crock pot at home.

Italian Beef sandwiches are traditionally wet-roasted to medium rare, then shaved thin on a deli slicer and finished in "the juice," then served on dense, chewy bread and topped with sweet peppers, hot peppers, or giardiniera (or some combination of the three).  I don't have a deli slicer handy, so my own version is shredded rather than sliced, but the result is much the same.  This recipe is an easy, delicious way to feed a large group - but make plenty, they may want seconds.


Here's what you'll need: 3-4 pounds of cheap beef (sirloin butt, top round, or bottom round), a couple of sweet onions, a couple of bell peppers, some beef broth, worcestershire sauce, garlic powder, italian seasoning, salt, and pepper.


Start by chopping the peppers and onions into large pieces.  Too small, and they'll either end up mushy or disintegrate altogether after cooking all day - and that just won't do.


Cover the bottom of the crock pot with a little more than half of the chopped veggies.  The rest will go on top in a minute.


Next, nestle the star player into the pot on top of the veggies, and cover that enormous hunk of beef with the rest of the chopped vegetables.  My cut of beef was a little bigger than I usually use, so it just barely fits in the pot - it took a while longer to cook, but it still turned out just fine.
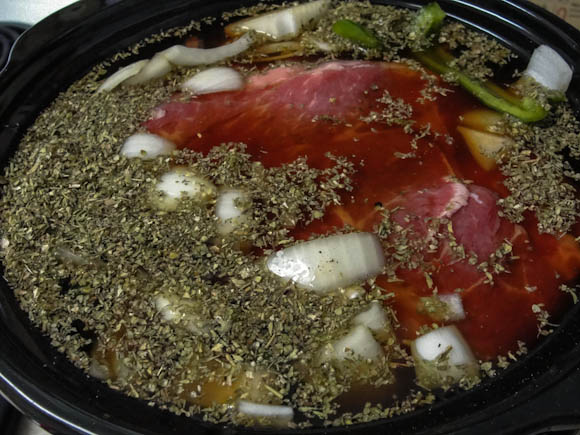

With the beef and vegetables in place, it's time to add the cooking liquid and the seasoning - add the Worcestershire sauce, beef broth, Italian seasoning, garlic powder, salt, and pepper to the pot.  Be sure to lift up the beef a bit to make sure that the liquid gets all the way down to the bottom of the pot.

With your liquid and seasoning in place, your beef is ready to cook.  Set the crock pot to low and cook 6-10 hours - the amount of time can vary quite a lot depending on the particular cut of beef you get.  The good news is that it's pretty tough to drastically overcook this beef, so if it goes an "extra" hour or two, no big deal.


You'll know the beef is done when it shreds very, very easily with a fork.  If it's at all tough to get apart, put it back in the pot and try again in an hour.  Once the beef is tender, shred it with a couple of forks until it's in nice, bite-sized pieces.


To assemble a sandwich, pile plenty of beef onto a good, chewy sandwich roll.  Drizzle with extra juice and/or serve with a cup of juice on the side.  Top the sandwich with roasted sweet peppers, giardiniera, hot peppers, or any combination thereof.  This time around, we used these Pickled Hot Peppers to great effect.

While this sandwich may never entirely stave off my craving for a Portillo's sandwich, this recipe is a nice approximation of the Chicago classic.  Enjoy!


Recipe: Crock Pot Italian Beef
Prep Time: 10 Minutes | Cook Time: 6-10 Hours in Crock Pot | Difficulty: Easy | Servings: 12-16

Ingredients
  • 3-4 lbs Beef (sirloin butt, top round, bottom round)
  • 2 large Sweet Onions
  • 2 large green Bell Peppers
  • 4 cups low-sodium Beef Broth
  • 3 tbsp Worcestershire Sauce
  • 2 tbsp Italian Seasoning
  • 1 tbsp Garlic Powder
  • 1 tbsp Salt
  • 2 tsp Black Pepper
Instructions
  1. Chop onions and peppers into large pieces.
  2. Line bottom of crock pot with half of chopped vegetables.  Set beef atop vegetables, then cover with the other half of the onions and peppers.
  3. Add Worcestershire sauce, Italian seasoning, garlic powder, salt, and pepper to crock pot.  Add enough beef broth to cover all of the ingredients.
  4. Cook in crock pot 6-10 hours on Low until a fork can easily pull the beef apart.
  5. Shred beef into small pieces with two forks.
  6. To assemble sandwiches, pile beef atop chewy sandwich rolls.  Drizzle with additional juice and/or serve with a side cup of juice.  Top with sweet peppers, giardiniera, and/or hot peppers.  Serve hot.


Sunday, September 9, 2012

Moo Shu Pork


Here are some things that are delicious:
  1. Pork
  2. Sauteed vegetables
  3. Mushrooms
  4. Eggs
  5. Hoi sin sauce

Conveniently enough, the items on this list can be combined to become something even more than the sum of its parts: Moo Shu Pork.  It's one of my dad's favorite dishes when we go for Chinese food, and for good reason.  When you take that pork mixture and wrap it up in a pancake with plenty of sweet-spicy Hoi Sin sauce...oh man.  Good things happen.  My Moo Shu may never quite stand up to the stuff we got from our favorite Chinese place growing up, but it's a pretty tasty alternative to make at home.  


Here's what you'll need: pork tenderloin, shredded cabbage, bean sprouts, shiitake mushrooms, green onions, eggs, hoi sin sauce, sesame oil, soy sauce, cornstarch, garlic, sake or rice wine vinegar, and some pancakes.

Your local grocery store may or may not have exactly what you would like - in my case, my pancakes are just flour tortillas, but many stores do sell pancakes specifically meant for moo shu and peking duck in the Asian food section.  It's also perfectly effective to shred cabbage yourself rather than grabbing cole-slaw mix, but I was in a weeknight hurry and the shredded stuff worked just fine.


First, chop the tenderloin into small strips.  Throw it in a bowl or ziploc bag with some soy sauce, sesame oil, a bit of sake or rice wine vinegar, and some corn starch.  Give it a good mixing, and let it sit for at least a half-hour.


While the pork is marinating, you can start in on the other components.  First, heat up a bit of oil and add your lightly-beaten eggs to the pan once it's hot.  Let the eggs set over medium heat, then flip the whole sheet and cook for just another minute or so.  Pull the eggs out of the pan, chop the sheet into small pieces, and set the eggs aside for later.


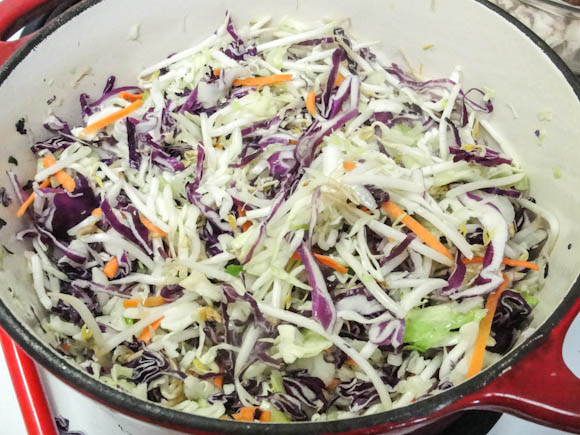
Add a bit more oil to your pan, then add your minced garlic and chopped green onions.  Saute just for a minute or so - be careful not to overcook - then add the shredded cabbage and bean sprouts.  At this point, it should be clear why I'm using a dutch oven rather than just a skillet: I'm making a whole lot of moo shu, and all that cabbage takes up lots of space.


Throw in a bit of sake or rice wine vinegar, since cabbage loves a touch of acid.  Let the veggies cook over medium heat, stirring often, until they're slightly wilted but still plenty crunchy.  The volume in the pan should reduce by about half.  Pull out the veggies and set them aside for later.


Add a bit more oil to the pan and bring the heat back up to medium-high.  Chop up your mushrooms, and saute them with the pork, marinade and all, until the pork is just barely cooked.  Do this in batches to make sure that the pan isn't too overcrowded.


Once your last batch of pork is done, the bottom of your pan will be covered in deep brown, flavorful porky goodness.  Don't let it go to waste!  Deglaze with some sake and soy sauce, scraping the bottom of the pan to mix in the porky goodness.  This will have the pleasant side effect of smelling divine.  Inhale deeply.


When you've got the pan nicely deglazed, bring back all of the elements that have been sitting and waiting so patiently on the side - the eggs, the veggies, and the pork mixture.  Mix well, and sample to see what flavors need adjusting.  Add more soy, sesame, or salt as you see fit.  Don't forget, this mixture doesn't need to do all of the heavy flavor-lifting - there's delicious hoi sin sauce to come, as well.


When you're ready to assemble, smear the center of a pancake with a generous amount of hoi sin, then spoon on plenty of the filling.  The filling retains a lot of liquid, so be careful, these can get messy fast - it wouldn't hurt to assemble using a slotted spoon.  Fold up your moo shu like a burrito, and you're ready to eat!

After writing this post, so am I.  Good thing we still have plenty of moo shu leftovers in the fridge.


Recipe: Moo Shu Pork
Prep Time: 30 Minutes | Cook Time: 30 Minutes | Difficulty: Easy | Servings: 12-16

Ingredients
  • 2-3 pounds Pork Tenderloin
  • 1 large bag (14 oz) Cole Slaw mix
  • 1 bag (8 oz) shredded Red Cabbage
  • 8 oz. Shiitake Mushrooms
  • 3 Eggs, lightly beaten
  • 1 bunch Green Onions
  • 1/4 cup Soy Sauce
  • 2 tsp Sesame Oil
  • 3 tsp Cornstarch
  • 1 cup Sake wine
  • 4 cloves Garlic, minced
  • 1 jar Hoi Sin sauce
  • Moo Shu pancakes (or tortillas)
Instructions
  1. Cut pork into thin strips.  Add to large bowl or ziploc bag with 2-3 tbsp soy sauce, 1 tsp sesame oil, a splash of Sake, and 2 tsp cornstarch.  Mix well and let sit at least 30 minutes.
  2. In a large pan or dutch oven over medium heat, cook lightly beaten eggs in a small amount of oil until barely set.  Flip and cook an additional minute.  Remove from pan and slice into small pieces.  Set aside.
  3. Saute minced garlic and chopped green onions in a tablespoon of oil over medium-high heat for about one minute.  Add cole slaw mix, red cabbage, bean sprouts, and sake. Cook over medium heat until vegetables are slightly wilted but still crispy.  Volume will reduce by about half.  Remove vegetables and set aside.
  4. Saute pork and chopped mushrooms in small batches with marinade over medium-high heat until pork is just cooked.
  5. After last batch of pork is finished, deglaze pan with sake and soy sauce.
  6. Return all ingredients set aside to the pan and mix well.  Taste and adjust seasonings as necessary.
  7. To assemble, spread a generous amount of hoi sin sauce onto a pancake, then add several spoonfuls of Moo Shu filling.  Roll burrito-style and serve warm.

Sunday, August 19, 2012

Rice Cooker Jambalaya


I received a rice cooker as a birthday gift several weeks ago - a gadget I'd been wanting for a while.  Not only will it make cooking rice much easier, but most rice cookers now also double as steamers and can cook a whole range of things.  I got my first use out of my new toy this week, making a big pot of jambalaya.

I searched around for recipes, and a few suggested that one could just dump all of the ingredients into the pot, hit "cook," and call it a day.  I wasn't quite that brave, so I did some pan cooking to prep the ingredients, but the rice cooker did the great share of the work - and did so admirably.  This meal ended up great - rich and meaty and flavorful and spicy.  It was a great use for a new gadget and a meal I'll definitely make again.


Here's what I used: medium-grain rice, shrimp, kielbasa sausage (not pictured - oops!), sweet onion, green peppers, garlic, chicken broth, crushed tomatoes, worcestershire sauce, cajun seasoning, salt, and pepper.

You can use just about any protein you like - I used shrimp and kielbasa, but you could use just one or the other.  Chicken and andouille sausage are also fairly common in jambalaya and worth considering.


First, chop up the vegetables.  I like a fairly large, rough chop on the onion and bell pepper to make sure that they maintain just a bit of crunch in the mixture.

Many jambalaya recipes also involve celery.  Kristin and I aren't celery fans, but if you are, feel free to chop some up and add it into the mix.


Saute the onion, bell pepper, and garlic over medium heat until they're just a bit tender and the onions are starting to get translucent.  Don't overcook them, as they'll cook a bit more in with the rice.


In the rice cooker, combine the rice, crushed tomatoes, chicken broth, worcestershire sauce, the sauted vegetables, plenty of cajun seasoning, and some salt and pepper.  Turn it on to cook and it will let you know when it's done.  You may need to add some more liquid and set it back to cook a bit longer after the first time the cooker stops cooking - taste and make sure the texture is to your liking.


While the rice cooker does its magic, give the shrimp and sausage a quick chop, then throw them into a pan together with a dash of seasoning and saute just until the shrimp are evenly pink - don't overcook the shrimp or they'll get tough.


When the rice cooker is finished, stir in the shrimp and sausage, taste to check and adjust the seasoning, and serve up some hot jambalaya!


Recipe: Rice Cooker Jambalaya
Prep Time: 10 Minutes | Cook Time: 1 Hour | Difficulty: Easy | Servings: 10-12

Ingredients

  • 3 cups medium grain White Rice
  • 1 pound Shrimp
  • 1-2 pounds Kielbasa Sausage
  • 1 large Sweet Onion
  • 2-3 medium Green Bell Peppers
  • 2-4 cloves Garlic
  • 1 large can (28 oz) Crushed Tomatoes
  • 2 cans low-sodium Chicken Broth
  • 2 tbsp Worcestershire Sauce
  • 3 tbsp Cajun Seasoning
  • Salt and Pepper to taste

Instructions

  1. Chop onion and bell pepper into large pieces.  Mince garlic.  Saute over medium heat until just tender.
  2. In rice cooker, combine rice, chicken broth, crushed tomatoes, sauteed vegetables, worcestershire sauce, cajun seasoning, salt, and pepper.  Set to cook.
  3. Shell shrimp if necessary.  Roughly chop shrimp and sausage.  Saute over medium-high heat until shrimp are pink.  Do not overcook.
  4. When rice cooker is finished (check doneness and add liquid if necessary), stir in shrimp and sausage. Taste and adjust seasoning as necessary.
  5. Serve hot.

Sunday, May 27, 2012

Pork Chops a la Nicole


One day, probably about a month or so, my cousin Nicole sent me a message on Facebook asking for a recipe suggestion.  It felt a little bit like Chopped - she had a few ingredients she wanted to use for a dinner, and wasn't sure what to do with all of them.  Thankfully, unlike Chopped, the ingredients all fit together nicely, so it was a fun set to try to think into a coherent recipe.


Here's Nicole with her husband Adam and their (bloody adorable) son Logan.

Nicole had pork chops, diced potatoes, and zucchini to work with, and was leaning toward doing it all on the grill.  Pork chops and the grill get along great, so that was no problem.  When it comes to diced potatoes, my first thought was a hash, and I figured the zucchini could fit in there just fine, too.  I suggested a marinade for the pork and a method for putting together a hash, and Nicole said it went great.

I could hardly suggest a recipe without then trying to make it myself, now could I?  I ended up making a few changes to my original suggestions based on Nicole's feedback, but my end result made or a seriously tasty dinner.


Here's what you'll need: pork chops, a bit of bacon, sweet potatoes, zucchini, a sweet onion, some olive oil, some vinegar (white or cider), garlic or garlic powder, basil, oregano, thyme, mustard, salt, and pepper.


First, combine a bit of oil, vinegar, mustard, and lots of the spices into a nice marinade for the pork.  It's best to let it marinate overnight, but if you're in a hurry an hour or two will do the trick.  Let it marinate in the fridge and come back when it's time to cook.


Once the chops have had plenty of time to marinade, grill them up.  For thin chops like I used, 2-3 minutes per side was plenty.  Do your best to time it so that your pork will be done and rested more or less at the same time as the hash, which will take 15-20 minutes to make from chopping to finish.


When you're ready to get started, peel and chop the sweet potatoes, and also chop the zucchini and sweet onion into small, bite-sized pieces.


Give the bacon a rough chop and get it rendering in a pan.  Take care not to overcook it - it'll go back into the pan with the rest of the hash later on.  When it's well rendered, but not yet crispy, pull it out and set it aside.


Drain off most of the excess grease, but leave a few tablespoons in which to saute the diced sweet potatoes.  Cook them, stirring often, until they're starting to brown on the outside.  Try a bite - careful, they'll be hot - and when they're reasonably tender, it's time to add more stuff to the mix.


When the sweet potatoes feel pretty tender, add the zucchini, onion, and bacon, as well as a generous helping of the seasonings - basil, oregano, garlic, thyme, salt, and pepper.  Continue to saute, stirring often, until the zucchini and onion are nice and tender, then taste and adjust the seasonings.  I added just a quick dash of vinegar in the last 30 seconds or so of cooking to brighten the flavors up, and it really helped a lot.


Serve your grilled chops atop a generous portion of hash, and be ready to offer seconds.


Recipe: Pork Chops a la Nicole
Prep Time: 5 Minutes (+2-24 hour marinade) | Cook Time: 15-20 Minutes | Difficulty: Easy | Servings: 6

Ingredients
  • 6 thin Pork Chops
  • 4 medium Sweet Potatoes
  • 4 medium Zucchini
  • 1 large Sweet Onion
  • 8 oz Bacon
  • 3 tbsp Olive Oil
  • 3 tbsp Vinegar (white or cider)
  • 3 tbsp Dijon Mustard
  • 2 tsp Garlic Powder
  • 1 tsp Thyme
  • 1 tsp Basil
  • 1 tsp Oregano
  • Salt and Pepper to taste
Instructions
  1. Combine olive oil, vinegar, mustard in a large resealable bag.  Add seasonings to taste.  Marinade pork minimum 2 hours.
  2. Grill pork chops 2-3 minutes per side until done.  Rest under foil until ready to serve.
  3. Peel sweet potatoes.  Chop sweet potatoes, zucchini, and onion into small, bite-sized pieces.
  4. Chop bacon down into bite-sized pieces and render in a pan over medium heat until tender.  Set aside.
  5. Drain away all but 2-3 tablespoons of grease.  Saute sweet potatoes in bacon grease until golden brown and tender.
  6. Add zucchini, onion, and bacon to skillet with sweet potatoes, season with garlic powder, thyme, basil, oregano, salt, and pepper, and continue to saute until all vegetables are tender.
  7. Optional: Add 1-2 tablespoons cider vinegar to hash in last minute of cooking and stir well.
  8. Serve grilled chops hot atop a generous portion of hash.

Sunday, May 13, 2012

Creamy Ranch Pasta Salad


Pasta salad deserves better.  Sure, it's a delicious side, but why leave it there?  Every grocery store deli will happily sell you some gloppy macaroni salad, but come on, we can do better than that.  Why not make pasta salad a main course?  Why not add enough great ingredients that it can stand on its own?  Most importantly -- why not bacon?


As you can see, my board is fuller than usual.  A lot of stuff goes into this pasta salad, but there's not a lot of prep for most of it.  You'll need some pasta, of course.  Go for an interesting shape - I used Cavatappi to great success this time around.

We'll feature a pair of proteins, both chicken and bacon.  For the veggies, I use broccoli, cucumber, carrots, and bell pepper - but you can add or change as you see fit.  A lot of people are into tomatoes - raw ones make me sad, but you can go crazy with them if that's your thing.  I also love some cheese in my pasta salad, so I added a block of extra-sharp cheddar.

Finally, the supporting cast is made up of Greek yogurt, a bit of mayonnaise and sour cream, salt, pepper, garlic powder, and a packet of ranch dressing mix.


We'll start with the chicken.  If it's warm enough outside and you have easy access, you can always just grill it.  Since we don't own a grill, though (alas!), I like to use this method to simulate grilling in the oven while adding a ton of flavor.

First, rinse the chicken and pat it dry.  Season it well with salt, pepper, and garlic powder, then give dip it in the Greek yogurt to coat.  The yogurt dip will keep the chicken super moist while it cooks, even while you get a nice, slightly-blackened exterior.

Lay the yogurt-dipped chicken out on a wire rack atop a baking sheet -- this should let hot air circulate around the whole chicken breast at once and keep the bottom from getting soggy.  You may even want to line the baking sheet with foil to catch the drips and make clean-up simpler.


Broil the chicken 6 inches away from the broiler about 5 minutes per side until it's nicely blackened on the outside and the inside is up to temperature.  Set it aside for later.


While the chicken is cooking, fry up the bacon.  Try not to eat too much of it before it ever gets into the pasta salad.  Dry the finished product on papers towels and set aside for later.


Don't forget that we need some pasta, too!  Cook it up according to the package directions, leaving it on the al-dente side.  Drain well and set it aside to cool once it's done.


Now for all of that other stuff.  Chop the broccoli, cucumber, bell pepper, carrots, and cheese into bite-sized pieces.  I like to quickly blanch the broccoli for 30 seconds or so in boiling water to soften it just a touch before I chop it, but that's up to you.


The chicken and bacon should be cool enough to handle by now, so give those a good chopping, too.


Finally, it's time to put it all together.  You'll probably need a couple of large bowls for this - this recipe filled up the two largest bowls in my kitchen handily.  Combine everything, preferably leaving a little extra room at the top of the bowl so that you can stir the dressing in easily.


Speaking of dressing, we'd better make some.  Combine the mayonnaise, sour cream, and ranch dressing mix and stir well.  Give it a taste and adjust as you see fit - I added a little more garlic and some dried herbs.


Add your preferred amount of dressing to the salad and stir well to mix.  I like it fairly lightly dressed - there's enough good stuff in these bowls to be tasty all by itself.


Throw it in the fridge to fully chill and let the flavors marry a bit, and you're ready to serve.  This is a fantastic, summery main course, and so easy to prepare well in advance.  Enjoy!


Recipe: Creamy Ranch Pasta Salad
Prep Time: 10 Minutes | Cook Time: 20 Minutes | Chill Time: 1-2 Hours | Difficulty: Easy | Servings: 12-15
Ingredients
  • 16 oz Cavatappi Pasta
  • 1-2 pounds Boneless Skinless Chicken Breast
  • 1 pound Bacon
  • 3 heads Broccoli
  • 1 large Cucumber
  • 2 large Green Bell Peppers
  • 8 ounces Baby Carrots
  • 8 ounces Extra-Sharp Cheddar Cheese
  • 1 1/2 cups Mayonnaise
  • 1/2 cup Sour Cream
  • 16 ounces Greek Yogurt
  • 1 packet Ranch Dressing Mix
  • 2 teaspoons Garlic Powder
  • Salt and Pepper to taste

Instructions
  1. Cook pasta according to directions on package.  Drain well and set aside to cool.
  2. Rinse chicken and pat dry.  Season well with salt, pepper, and garlic powder then coat completely with Greek yogurt.
  3. Place yogurt-covered chicken on a wire rack atop a baking pan and broil approx. 5 minutes per side until blackened on the outside and done in the middle.  Set aside to cool.
  4. Fry bacon in a heavy skillet.  Dry well with papers towels and set aside.
  5. (Optional): Blanch broccoli 30 seconds in boiling water.
  6. Chop all vegetables and cheese into small, bite-sized pieces.
  7. Once chicken and bacon have cooled, chop into small, bite-sized pieces.
  8. Combine pasta, chicken, bacon, cheese, and vegetables in large bowl(s).
  9. In a small mixing bowl, combine mayonnaise, sour cream, and ranch dressing mix.  Adjust seasoning to taste and stir to mix.
  10. Add dressing to pasta mixture to taste and stir well to combine.
  11. Chill at least 1-2 hours before serving.  Serve cold.